My new Windows 365 Cloud PC: Windows 11, Docker Desktop and WSL2
Contact me for information about consulting and training at your company.
The MEAP for Microservices Patterns 2nd edition is now available
Windows has been a bit of mystery to me ever since I switched to Mac back in 2009. But, I recently need to debug a Windows-related problem with my Manning LiveProject. In order to investigate the problem, I needed a Windows machine that could run Docker for Desktop Windows. I was reluctant to simply buy a Windows laptop so I searched for alternative solutions. This post describes how after trying Parallels and Azure VMs, I picked Windows 365 Cloud PC.
Parallels Desktop 17 for Mac - slow and buggy
I eventually stumbled across the idea of using Parallels on my Mac. While running Windows on my Mac in a VM is, perhaps, an obvious solution there’s one complication. Docker for Desktop for Windows needs a (Linux) virtual machine. In other words, this setup requires nested virtualization - a Linux VM inside a Windows VM - which is not officially supported by Docker.
Fortunately, it ‘works’ when using Parallels Desktop 17 for Mac on an Intel-based (not M1-based) Mac. Note: Parallels Desktop 17 for Mac is confusingly different than Parallels Desktop in the App Store. I say, ‘works’, because it was sometimes very slow and I needed to periodically reboot Windows.
Once I’d got everything setup, I discovered two problems with running the LiveProject on Windows.
First, when using the WSL2 command line, there was a networking issue with the Docker Compose plugin for Gradle.
This problem was fixed by simply using a new version of the plugin.
Second, when using the Powershell command line, there was a problem with volume mounting when running test containers-based tests due the dual personality environment: c:\somedir\... vs. /mnt/c/somedir/...
I fixed this problem by building Docker images locally instead of volume mounting Prometheus and Keycloak configuration files.
By using Parallels I was able to run Windows on my MacBook and fix this problem. But it was slow and didn’t run on my primary M1 MacBook. I figured it was time to look at the Cloud!
Creating a Windows 10/11 VM on Azure is easy but …
First, I tried using an Azure VM. Technically, it’s quite straightforward apart from figuring out which of the remarkly confusing VM types supported nested virtualization. Once I’d done that it was just a few mouse clicks to create the VM and connect to it with Remote Desktop. The problem, however, is that the VM apparently doesn’t come with its own license. At this point, I entered the hell that is the documentation for Microsoft licensing and gave up.
Windows Cloud PC - first attempt
Next, I chatted briefly with Bruno Borges who helpfully suggested that I look at Windows 365 Cloud PC. This looked extremely promising since its rent-a-PC in the cloud. But what wasn’t obvious, is whether it supports nested virtualization. Sadly, the website is focussed on telling customers how happy and fullfilled they will be rather than providing any useful technical details.
However, I googled and found an article describing how Windows 365 Enterprise Cloud PCs support nested virtualization. With just a few clicks of the mouse I bought a 8-core, 32G Windows 365 Enterprise Cloud PC. I then waited, and waited, … It turned out that I did not have an ‘enterprise’ account and the deployment failed.
Windows Cloud PC - second and successful attempt
I then created an 8-core, 32G Windows 365 Business Cloud PC. I couldn’t find any documentation (or get a quick answer from Microsoft support) describing whether ‘Business’ Cloud PCs support nested virtualization but I figured that I had very little to lose by trying.
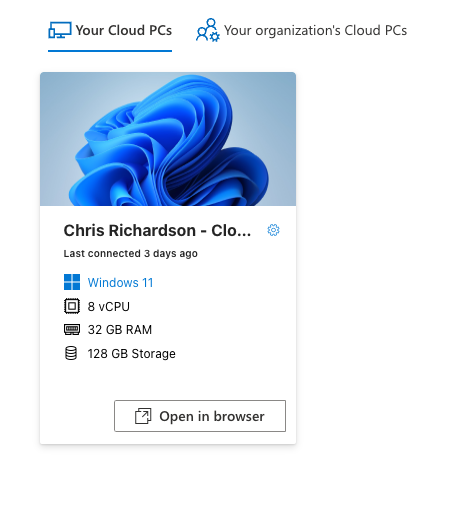
I was pleasantly surprised to discover that I finally had a Windows 11 PC capable of running WSL2 and Docker Desktop for Windows. It’s accessible via Microsoft Remote Desktop and seems fairly responsive. The Cloud PC costs USD $123/month so its probably a bit more expensive than buying a laptop. But at least I don’t need to carry it around.

 Premium content now available for paid subscribers at